Storage Solutions

I’ve been going through outdated papercrafting magazines this week…flagging pages I wanted to keep… and making painful choices of what to send to the recycle bin. I LOVE magazines! But finally, I just don’t have the space to store them.

I came across this article and had a good chuckle. It’s a quick read and I’m sure many of you will be able to identify with this dear soul. Maybe you’ll discover some solutions for storing your own crafting supplies! LOL!

Hiding My Stuff 
by Roberta G. Wax

My husband can’t figure out why I need so much stuff just to make a few simple little cards – and why my stuff constantly overflows my allotted space.

He is really a generous man who would never begrudge my purchasing an extra pair of shoes, a new vase for the dining room, or some pretty bauble for the bathroom. He is, however, bothered by what he sees as an overabundance of stamping supplies, supplies that seem to be taking over the world.

So until my daughter moves out and I can take over her room, I have figured out how to make my storage solutions part of the decor.

Shoe boxes. What man in his right mind would question an extra pair of shoes in the closet? (What man in his right mind even bothers to look in his wife’s closet?)

Decorative items. My husband rarely questions a pretty box or knick-knack that shows up on the coffee table. These decorative boxes store beads, buttons, glass marbles, and tiny embellishments.

Photo albums. Who needs so many vacation pictures of blurry monuments? Use these for stickers, paper, card stock, pre-stamped images, etc.

Cookie jars. Upside: they are great for hiding small stamps, embossing powders, glitter, etc. Downside: sometimes people, especially children, actually want a cookie.

Skirt hanger. Perfect for large sheets of paper – just drape the paper over a hanger, then slip a blouse or dress on top. It may crinkle a bit, but just pretend you went too heavy on the starch.

Lidded footstools in front of a favorite recliner. A great hiding place for paper or fabric. It’s just tricky retrieving items during a televised sports activity.

Tool box. This can be dangerous if you have a spouse, child or roommate who likes to fix things. And never leave your tools (embossing tool, good beading pliers, etc.) where your in-house mechanic might use them to fix the toilet or tune the carburetor.

———————–

Have a great weekend everyone!
Signature

Stamping Session

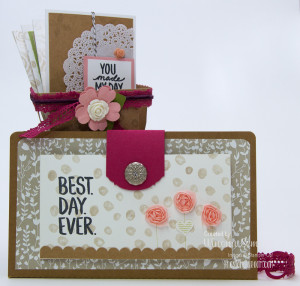
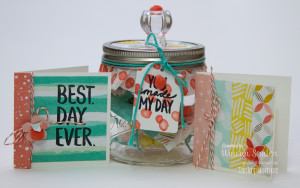
It’s always a treat to sit down and make projects that I didn’t have to prep or design…I just get in the zone. So I really appreciated sitting down on Saturday afternoon to make these beautiful projects that Becky designed. And of course, for those who know me, any project that involves a mason jar is a big winner!! You will definitely see a version of this in a future class:)

Winona_Inking_Idaho_Project-1

best_day_ever-2

best_day_ever-1

It’s not too late to get this stamp set for FREE! Sale-a-bration is on until March 31st…place a $60 product order and receive the BEST Day Ever Stamp set for FREE!!! The designer series paper and accessory pack are also free options. 

Don’t miss out on these sweet deals…place an online order through my store this weekend. I would love to send you the set of tile art pieces using the Sheltering Tree. 

Thanks for stopping by,

Signature

More Sheltering Tree…

I have 3 more ideas to share with you today using that same Sheltering Tree stamp set.

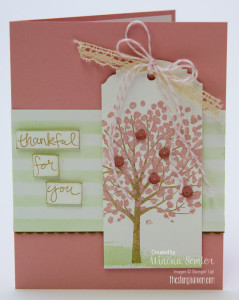
#4: I embossed the blossoms on the tree with blushing bride embossing powder and embellished it with the little sequins from the InColor Sequin Assortment. The dots & stripes decorative masks were used to create the stripes in the background. I simply used my sponge daubers and pistachio pudding ink. SO pretty!

sheltering_tree-4


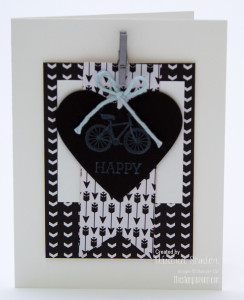
 #5: I cased the idea for this card from the Hello Life Project Kit in the Occasions Catalogue. Super simple. LOVE the bicycle :) The word HAPPY is from the Crazy About You set. Love the black & white look.

sheltering_tree-5


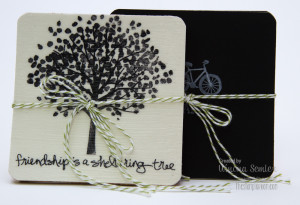
 #6: And finally, I showed them how to make tile art…and turn them into coasters. The black/white ones used Whisper White Craft Ink onto Chalkboard Paper. The vanilla ones were Black StazOn ink onto our vanilla coaster board.

sheltering_tree-6

 If you want to turn them into coasters, you need to seal them with a Krylon spray first, then paint a thin layer of modpodge over all. I rounded the corners and adhered them to some cork backing. (Crystal Effects works well.) These make great hostess gifts!!

Don’t forget to check out the new Weekly Deals!

You can shop 24/7 through my online store. All supplies for these projects can be found there! Remember when you place a qualifying Sale-a-bration order online ($60 or more), you will receive a set of 4 tile art pieces as shown above.

Thanks for stopping by.
Have a good one,

Signature