A Little Kindness…and a little surprise

My daughter Samantha penned a saying for one of my frames that says, “Kindness Changes Everything.” I love it. It’s a daily reminder to think before we speak…before we act…and to be intentional in showing kindness to those around us.

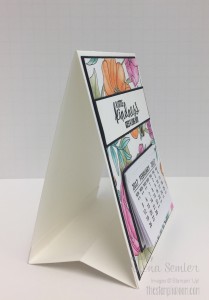
One of our stamp sets called Kinda Eclectic has a similar saying in it…”A little kindness goes a long way.” I chose to use it as the focal point of our easel calendars we made in club last night.
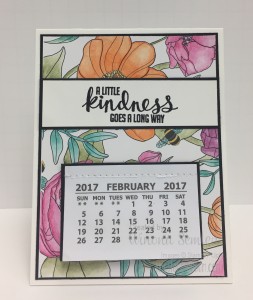
Calendar-Easel-2017Here’s a look from the side…
Calendar-Easel-2017-2They are really quite easy to make. We used the new Inside the Lines DSP from the Sale-a-bration brochure, so coloring took a while, but you could use any DSP. We used the Watercolor Pencils and Blender Pens…and you don’t have to be an artist to watercolor. The Blender Pens work their magic making you look like a pro!

To make the easel:
Use Thick White Cardstock.
     cut a 4-1/2″ x 11″ piece and score at 5-1/2″ (just like a standard card)
     cut a 4-1/2″ x 4″ piece and score at 1/2″, 2″, and 3-1/2″
         → Place Tear & Tape on both 1/2″ end pieces and adhere to the inside of the card base.

The mini calendars can be found on Amazon.

Last night was my first round of classes since coming back from Kelowna.  A couple of my friends surprised me with a little kindness of their own. Check these out!
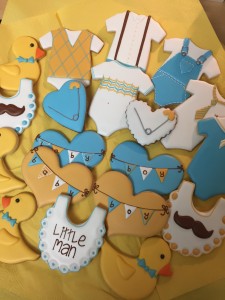
Baby-Cookies-1They had been following my posts about our new grandson Huxley, so took some ideas from there. I mean…look at the detail on these cookies. Crazy!
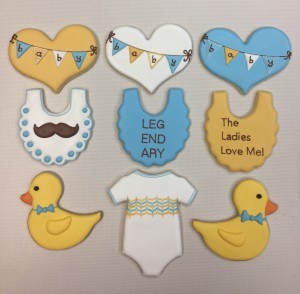
Baby-Cookies-2Seriously!! I love them all! Not only do they look adorable, but they taste good too:) Thank you Pearl and Julie…what a treat. (You can check out the creator on Instagram under bevmadecookies.)

They also brought this yummy edible arrangement…
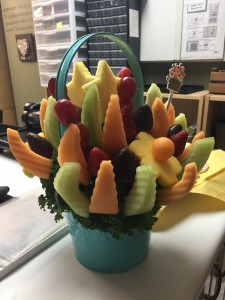
Baby-Cookies-3Needless to say, we had a little feast.

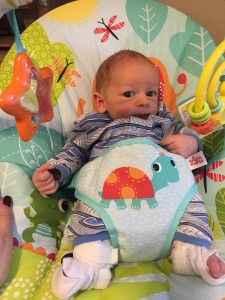
It’s been a little tough coming back to my office this week. I miss all the relaxing family time and daily snuggles with Huxley. For now, Facetime will have to do:)Huxley Gordon 10
You can find the supplies to make this easel calendar in my online store HERE. Be sure to take advantage of Sale-a-bration.

Reminder: There is only 1 more week left to register for Stamp Cafe on March 18th!!
Find all the details under Events.
Thanks for stopping by,
Signature

Balloon Adventures

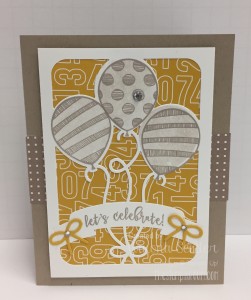
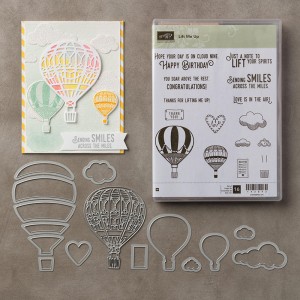
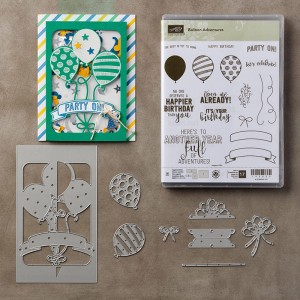
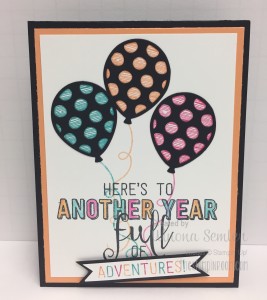
Don’t you just love the fun fonts used in the Balloon Adventures stamp set? And it’s always better when there are coordinating thinlits dies to cut the images out. Balloon-Adventures-1                                                      Balloon Adventures Photopolymer Bundle
                                                                               Price: $68.25

I recently received these beautiful cards in a leader swap I participated in.  This first one was created by Mimi Hemwood. I love the color combo…and the black overlay makes them POP so nicely. Balloon-Adventures-2Our family is definitely in for a year of adventures. First a grand baby…then we are traveling to visit our daughter and son-in-law in Australia at the end of March…and then we will be going to Thailand with Stampin’ Up! in July! Whoa. That’s A LOT of flying hours for a gal who doesn’t love flying…

This second card is cut out with the largest piece in the thinlits set. It cuts the balloons, frame, and banner out all in one piece. Brilliant! Karina Chin used Tip Top Taupe and Crushed Curry colors  for her design.Balloon-Adventures-3By purchasing this bundle, you will qualify for a free Sale-a-bration item. You will find the Balloon Adventures Bundle and all these supplies in my online store HERE.

          Use this HOSTESS CODE GM96Q373 at checkout.

Do you have a long wish list? If so, why don’t you consider purchasing the Stampin’ Up! starter kit. You will get to choose $165 of product and only pay $135. PLUS, you get to choose 2 additional stamp sets for free…any price! No shipping or taxes. Now THAT’s an awesome deal! I would love for you to give it a try:) Click HERE to choose the products you want and build your personal kit.

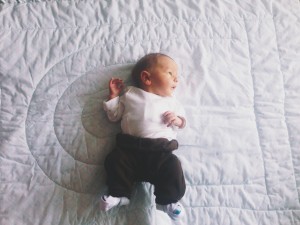
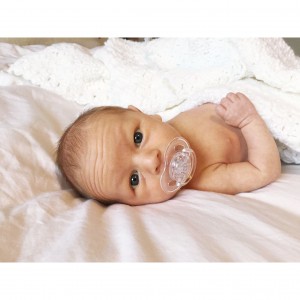
And finally…a little updated picture from Huxley Gordon this week:) You see his little braced feet in this picture. Because he was a breach baby, he had loose hip joints. As a result he is in a soft body brace to keep especially his right hip joint in place. We are hoping he will only have to wear it for 6 weeks….we are almost half way there:) He doesn’t mind it at all. It was put on the day after he was born, so he doesn’t know anything different. Don’t you just love those eyes though?!Huxley Gordon 9Thanks for checking in today…
Signature

Lots of Snuggles

Hello FebruaryWe are SO in love with this little man…seriously. My husband and other daughter arrived last night and they finally got to meet Huxley. We are each making sure we get our snuggles in.
Huxley Gordon 4He is 1 week old and we already cannot imagine our lives without him. Welcome to the family sweet Huxley Gordon.

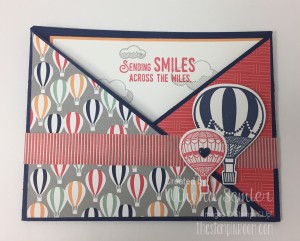
Yesterday I showed you the decorative corner card…they also made a criss-cross card.Lift-Me-Up-4This is a super fun fold with a pull-out message. My team member Lorna Raczynski made a bunch of samples for our display boards in Toronto…this was one of them. I love the message.
Lift-Me-Up-5Here are the instructions on how to make a criss-cross card. You’ll notice that the coordinating Carried Away DSP is also used on this card.

Criss-Cross Card:

Supplies:           Two 4-1/4” x 11” pieces of cardstock (for your card base)
                              One 4” x 5” piece of patterned paper
                              One 3-3/4” x 5” piece of coordinating cardstock (for insert)
                              One 3-5/8”x 4-7/8” piece of neutral cardstock to stamp on (for insert)

Step 1:   Score both 4-1/4” x 11” pieces of cardstock at 5-1/2”.

Step 2:   Take one scored piece and cut it diagonally from centre top to the bottom left.

Step 3:   Take the other piece of scored cardstock and cut it diagonally from the centre top to the bottom right.

Step 4:   Tape both pieces together (using Fast Fuse or Tear & Tape). Make sure both long edges of the diagonal sections are on the bottom.

Step 5:   Cut the patterned paper in half diagonally and adhere them to your card front.

Step 6:   Tape the card base together using Tear & Tape.

Step 7:   Stamp on inside neutral piece and adhere to solid piece for insert. Slide it in.

 You will find the Lift Me Up Bundle and all these supplies in my online store HERE.

Lift-Me-Up-BundleRemember that you get to choose a free item from the Sale-a-bration brochure when your order is over $60. If you order this Lift Me Up Bundle, you can receive the Carried Away DSP as your free item!

If you have been thinking about purchasing the Stampin’ Up! starter kit, now is a great time. In addition to free shipping and taxes on your kit, you get an additional 2 FREE stamp sets of your choice. You have nothing to lose. I would love for you to give it a try:) Click HERE to choose the products you want and build your personal kit.

Have a great day everyone…it’s my turn for snuggles:)
Signature